Changing the background of a photo can be a great way to salvage an excellent photo of a subject where the background didn’t turn out that well. It can also be used to ‘superimpose’ the subject onto a new background.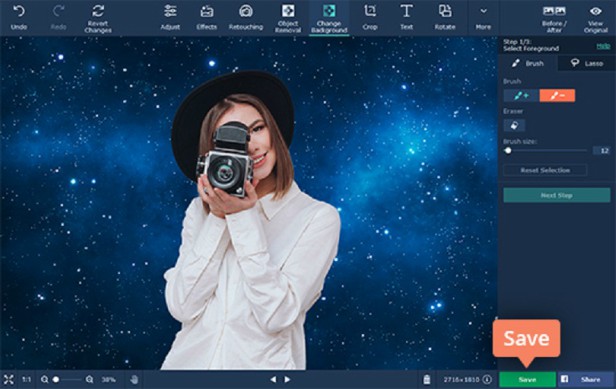
Normally it can be a bit tricky to perfectly select the subject so that only the background is removed, but that is a lot easier with Movavi Photo Editor. In fact if you use it as a photo background changer you should be able to quickly remove and replace your background without any difficulty.
Assuming you already have a photo where you’d like to change the background you should launch Movavi Photo Editor and click on the ‘Browse for Images’ button to add it to the editor. Next you will need to click on the the ‘Change Background’ tab to open up the sidebar that has the tools that you need.
Initially you can click on the ‘Foreground Brush’ and use it to mark the subject and any other foreground elements that you’d like to keep. After that click on the ‘Background Brush’ and use it to mark the background. At this stage you don’t have to be that precise, but if you want you could try the ‘Lasso’ tool to improve the selection. When you’re done you can then click ‘Next Step’ to move on and use Movavi Photo Editor to refine your selection further.
In the next step Movavi Photo Editor will provide several tools that will help you more precisely select the foreground and background. By using the ‘Mask Brushes’ you can refine the borders, whereas the ‘Hair Selection’ tool will help you to select fine details – such as hair. If and when you’re fully satisfied with the selection, you can click on the ‘Next Step’ button and this time the background will be removed.
To add a new background to the image all you need to do is click on the ‘Add Image’ button then select one of the built-in backgrounds or click ‘Upload’ to choose your own image file. Assuming everything checks out you can click ‘Apply’ to finalize the changes, then click ‘Save’ to have Movavi Photo Editor save the photo.
All in all none of the steps are that complicated, and selecting the right parts to remove will be much easier in Movavi Photo Editor. Before you move on and save your photo, you may want to try using its other features to enhance their quality, apply artistic filters, add captions, remove unwanted objects, touch up portraits, and more.
Each feature in Movavi Photo Editor is designed to be intuitive, and at this point you should be able to see how that’s the case if you want to change the background of a photo. By experimenting with some of the other features you’ll be able to get a better idea of what they can do, and how you can use them to improve your photos as well.